My Latest Painting: Signs And Signals

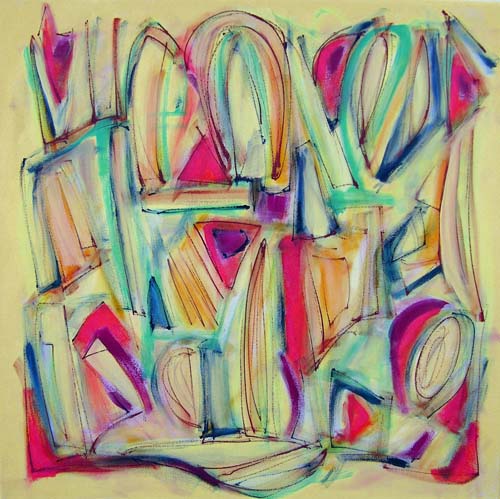
This new painting evolved over many steps with the application of layers of acrylic paint.  I first worked on a background which consisted of blending a number of colors very loosely with a wet brush:

Signs and Signals, Step 1

Signs and Signals, Step 1

The next two steps involved drawing lines of color across the canvas--first with one orientation, then turning the canvas 90 degrees and drawing more lines. 


Signs and Signals, Step 2 and 3

Signs and Signals, Step 2 and 3

In the next stages of the process, I began filling in some of the shapes that were created by the intersecting lines.  I used a pale beige, very pale yellow, dusky green, teal, and a reddish orange.  These painted sections then popped forward from the background, providing a path for the eye to follow.

Signs And Signals, Step 4

Signs And Signals, Step 4

At this point I wasn't sure what I wanted to do, but took the plunge and added some texture by drawing straight, zig-zag, and circular lines on several sections of the canvas.

Signs And Signals, Step 5

Signs And Signals, Step 5

Now I had no idea what to do next.  I liked what was there so far, but the painting still felt "unfinished" to me.  So I took a radical step.  I mixed the pale yellow with water and gloss medium to make it translucent, and then painted over large sections of the canvas.  Next, I dipped my brush into a thin, light teal and brushed that on the swirls inside the circular shapes.  I also added it in zig-zag lines across some of the other shapes. 

Finally, I took a deep cadmium red and drew somewhat random lines across the canvas.  Wow.  This turned out to be a painting unlike any I'd ever done!  Here it is:  Signs And Symbols.
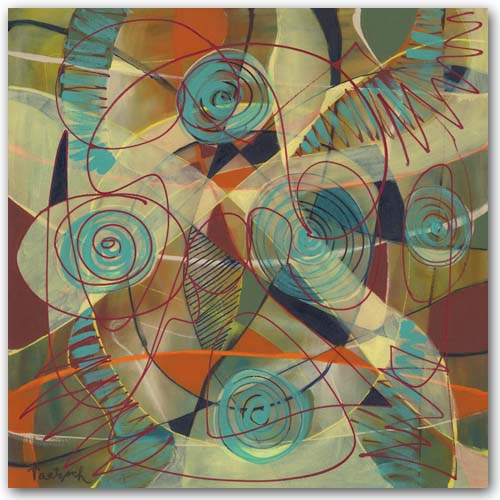
The Evolution of An Abstract Painting

As I worked on a new 30" x 30" abstract painting over several days, I took photos of it along the way.  It was not a painting that came easily, and I'm still not sure if it's "finished."  I will let it sit for a while before I sign it. 

Here's the process step by step:

Step 1I began by painting the whole canvas in a light lemon yellow, which comes across with a tint of green in this photograph.  I was working loosely, brushing on some cadmium red deep, green gold, and a pale green here and there, blending the…

Step 1

I began by painting the whole canvas in a light lemon yellow, which comes across with a tint of green in this photograph.  I was working loosely, brushing on some cadmium red deep, green gold, and a pale green here and there, blending them in.

Step 2I added a lot more color here:  cadmium red light, Prussian blue, and cadmium yellow medium.  I also added in more of the pale green.  Again, I painted loosely, working in an overall fashion to develop the composition.  The…

Step 2

I added a lot more color here:  cadmium red light, Prussian blue, and cadmium yellow medium.  I also added in more of the pale green.  Again, I painted loosely, working in an overall fashion to develop the composition.  Then I drew lines in Prussian blue and brushed over them lightly to soften the effect.

Step 3At this stage I drew sketchy lines with burnt sienna, and then brushed over them to blend them a bit with the background colors.  I also used the pale yellow background color to soften a lot of the brighter yellows.  Finally, I drew …

Step 3

At this stage I drew sketchy lines with burnt sienna, and then brushed over them to blend them a bit with the background colors.  I also used the pale yellow background color to soften a lot of the brighter yellows.  Finally, I drew more lines with the Prussian blue.  At this point I might have called the painting "finished."  It felt good to me in many ways.  But it wasn't quite there yet.

Step 4I took a bold move here which changed the painting drastically and might not have worked:  I filled in spaces with small circles of color:  light Hansa yellow, medium yellow, and orange.  I also added more cadmium red light in p…

Step 4

I took a bold move here which changed the painting drastically and might not have worked:  I filled in spaces with small circles of color:  light Hansa yellow, medium yellow, and orange.  I also added more cadmium red light in places, and more of the pale green.  The image was now becoming more dense and solid.  But it felt like I'd gone in the right direction.

Step 5In this final step, I first painted the outer yellow area with cadmium yellow medium.  That created a kind of "frame" for the central image.  Then I began to fill in some of the small circles of color--first some orange, and then som…

Step 5

In this final step, I first painted the outer yellow area with cadmium yellow medium.  That created a kind of "frame" for the central image.  Then I began to fill in some of the small circles of color--first some orange, and then some of the Hansa yellow.  Now I have to step back and study the canvas.  The outer more golden yellow may be too strong.  I might have contrived and controlled too much and lost too much of the sketchiness I had at the beginning.